0

DIY Ideas for the week: From Hearts to Seeds in One Swift Jump

The weather has been amazing the past two days. It really makes you wanna start planting some pretties and yummies to breathe a little life and color into the home.

This plant pot cover is soooo easy, it’s ridiculous.

This cute plant pot starter, but this one is a little more kid friendly that I plan on doing with my little Elise soon. She’s finally at an age where she adores getting her hands dirty.

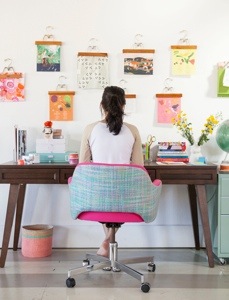
On another note, this is such a cute and easy way to display prints in your home. This is a great idea for renters or for people who have the tendency to redecorate frequently (like me!)

20140219-130927.jpg

Hope you’re having a great week! These projects are making me excited to get my hands in the dirt during the weekend! Got a few projects you’re excited to get started on?

0

DIY Baby Find: DIY Plaster Milk Carton Houses | Paper & Stitch

image

I’ve asked my friends and family this holiday season to make the effort to make presents this year, especially for the little one. Or, if they can’t make, at least buy locally/regionally. In our world mass-produced toys are the norm. The building blocks of young imaginations are being predetermined by massive corporations. This year, and for the years to come, I wish for the toys that my daughter plays with to be the simple building blocks of the worlds that she will create.

Today’s find is the inspiration behind the kind of toys I wish for my daughter to play with. Although this tute is for very heavy plaster houses, I plan on making a version sans plaster for my little one to play “house” with.

What are some creative ideas you’ve had when making toys for little ones? Simpler really is better for itty bitties with endless imaginations, it seems.

0

How To: Turn a Baby’s Long-Sleeved Shirt into a Short-Sleeved Shirt

Every time I look in my babe’s closet lately I have this urge within me to run straight to the cutest baby store and buy her some cute, over-priced t-shirts. She has a ton of winter shirts that still fit her but that are way too warm now for everyday wearing. So I take this consumerist urge and turn it into a sewing project!

Below, you’ll find my first ever tutorial of how to turn a long-sleeved shirt into a short-sleeved, making your favorite winter shirt into your favorite spring shirt. Hopefully, this will be easy to understand and read – I welcome any feedback!

Tools Needed:

  • Sewing Machine
  • Long-Sleeved Shirt
  • Short-Sleeved Shirt
  • Fabric Pen
  • Pins
  • Needle & Thread

Directions:

  1. Pick out a long-sleeved shirt that your baby is still able to wear, but that would look good as a spring t-shirt.
  2. Pick out a different t-shirt. This shirt should have sleeves at a length that you want the long-sleeved shirt to have.
  3. Place the short-sleeved shirt on top of the long-sleeved shirt.
  4. Using a fabric pen, draw a line on the sleeves of the long-sleeved shirt. Use the short-sleeved shirt as a guide for where you’d like the “new” shirt’s sleeves to be. Make sure to add an inch of extra sleeve to the length. You will need the extra fabric for hemming the sleeves.
  5. Cut the sleeves where you drew the line. Discard extra fabric.
  6. Turn shirt inside out. Fold half an inch of the sleeves two times. Pin the folded fabric with pins so that the fabric doesn’t fall out of place.
  7. Place one sleeve under the machine and slowly start the machine. Sew about half an inch away from the sleeve edge.
  8. Pull the back of the sleeve away from the machine. Work carefully to not sew the opposite side of the sleeve at the same time.
  9. Repeat with the second sleeve.
  10. Iron the edges of the sleeves for a cleaner sleeve line.
  11. For a less complicated, but more lengthy way of hemming the sleeves, you can also hand sew the sleeves.